Product Design - Toothbrush Design
In this project, I was given the option of designing a new product and then making it. The options were to make either a new type of toothbrush, USB key or a knife. I chose the toothbrush option! Now this is no ordinary toothbrush. Being me, I had to go weird with it and decide to make a toothbrush specially for dogs! Why not just challenge yourself to design a product where the user (owners are more servants to their dogs!) can't tell you what is and is not comfortable and practical!
To start off, I had to do some research into the already existing products available. I identified several different types of dog tooth brush and noted their good and bad qualities, and used this to improve my design. I started writing down research in notebooks to help my design.
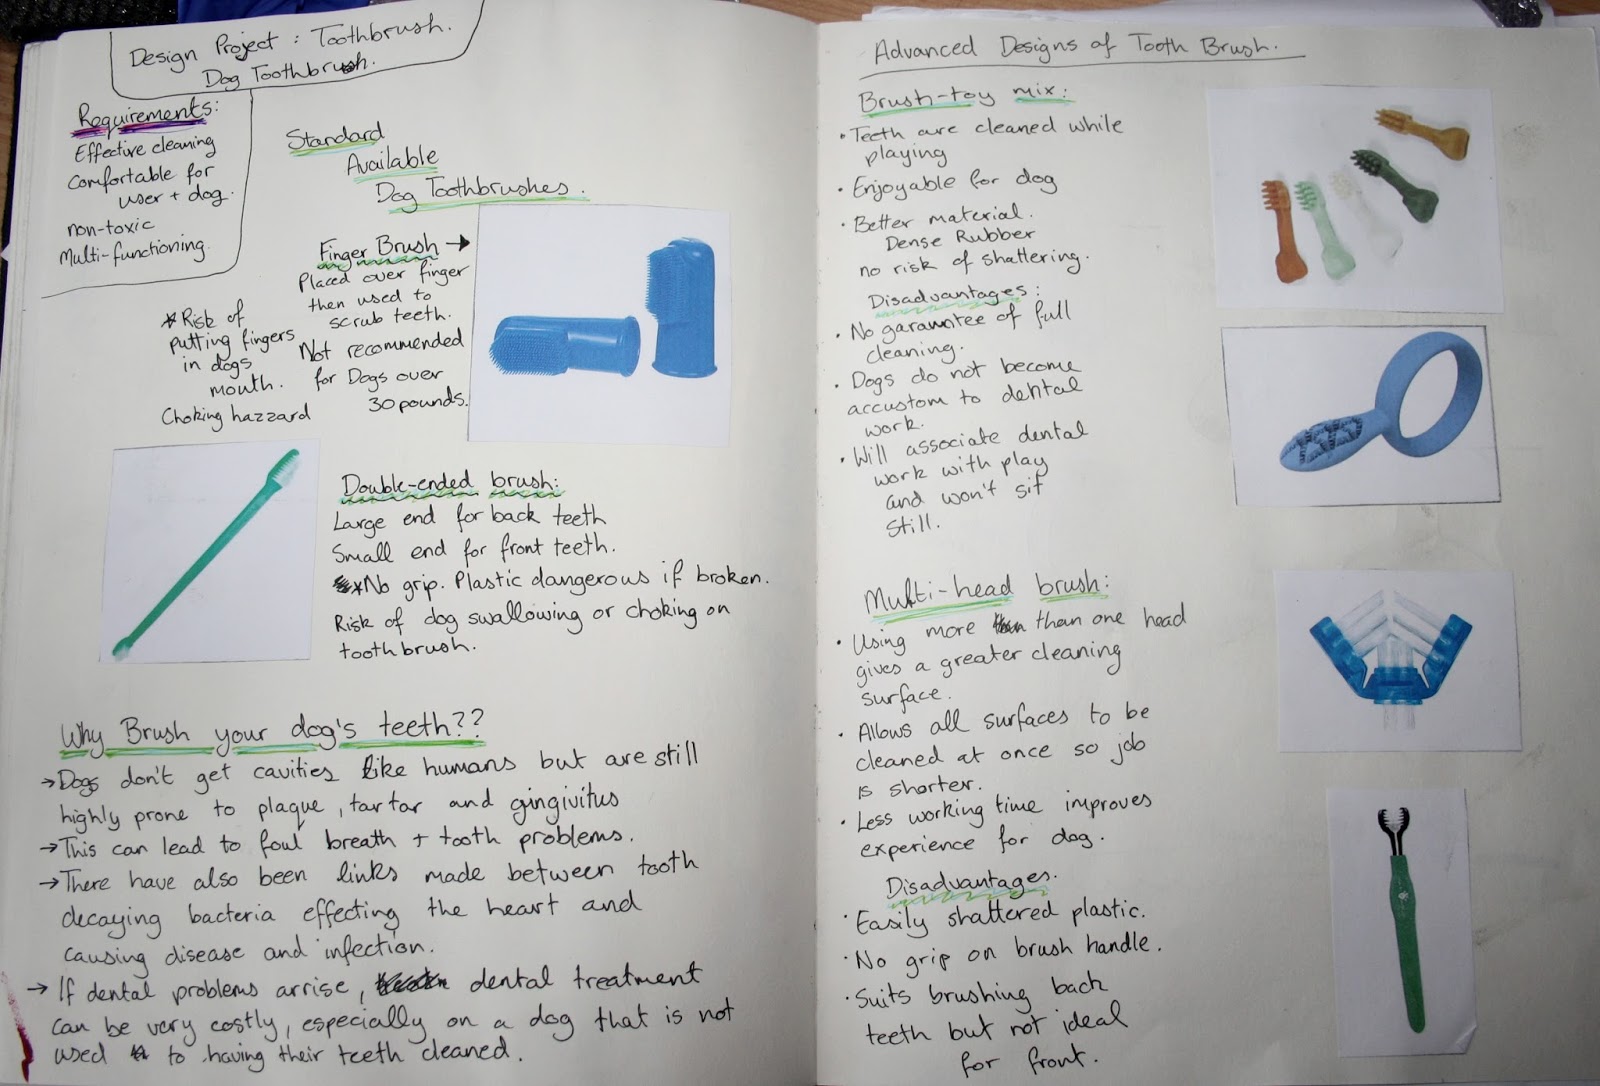
After doing this research I began designing a new toothbrush that would be comfortable for both the user and the dog. I wanted to make a brush that would have effective cleaning from every angle, that was easy to use, and that made the entire cleaning process quick and efficient. Things I had to consider were : Handle design; does it suit all hand sizes. Overall length of brush; can it be used on both large and small dogs. A brush that was too long could affect the controlling of the brush and affect quality of cleaning. Brush Head; does the brush clean at maximum efficiency. Do the bristles reach all surfaces of the teeth.
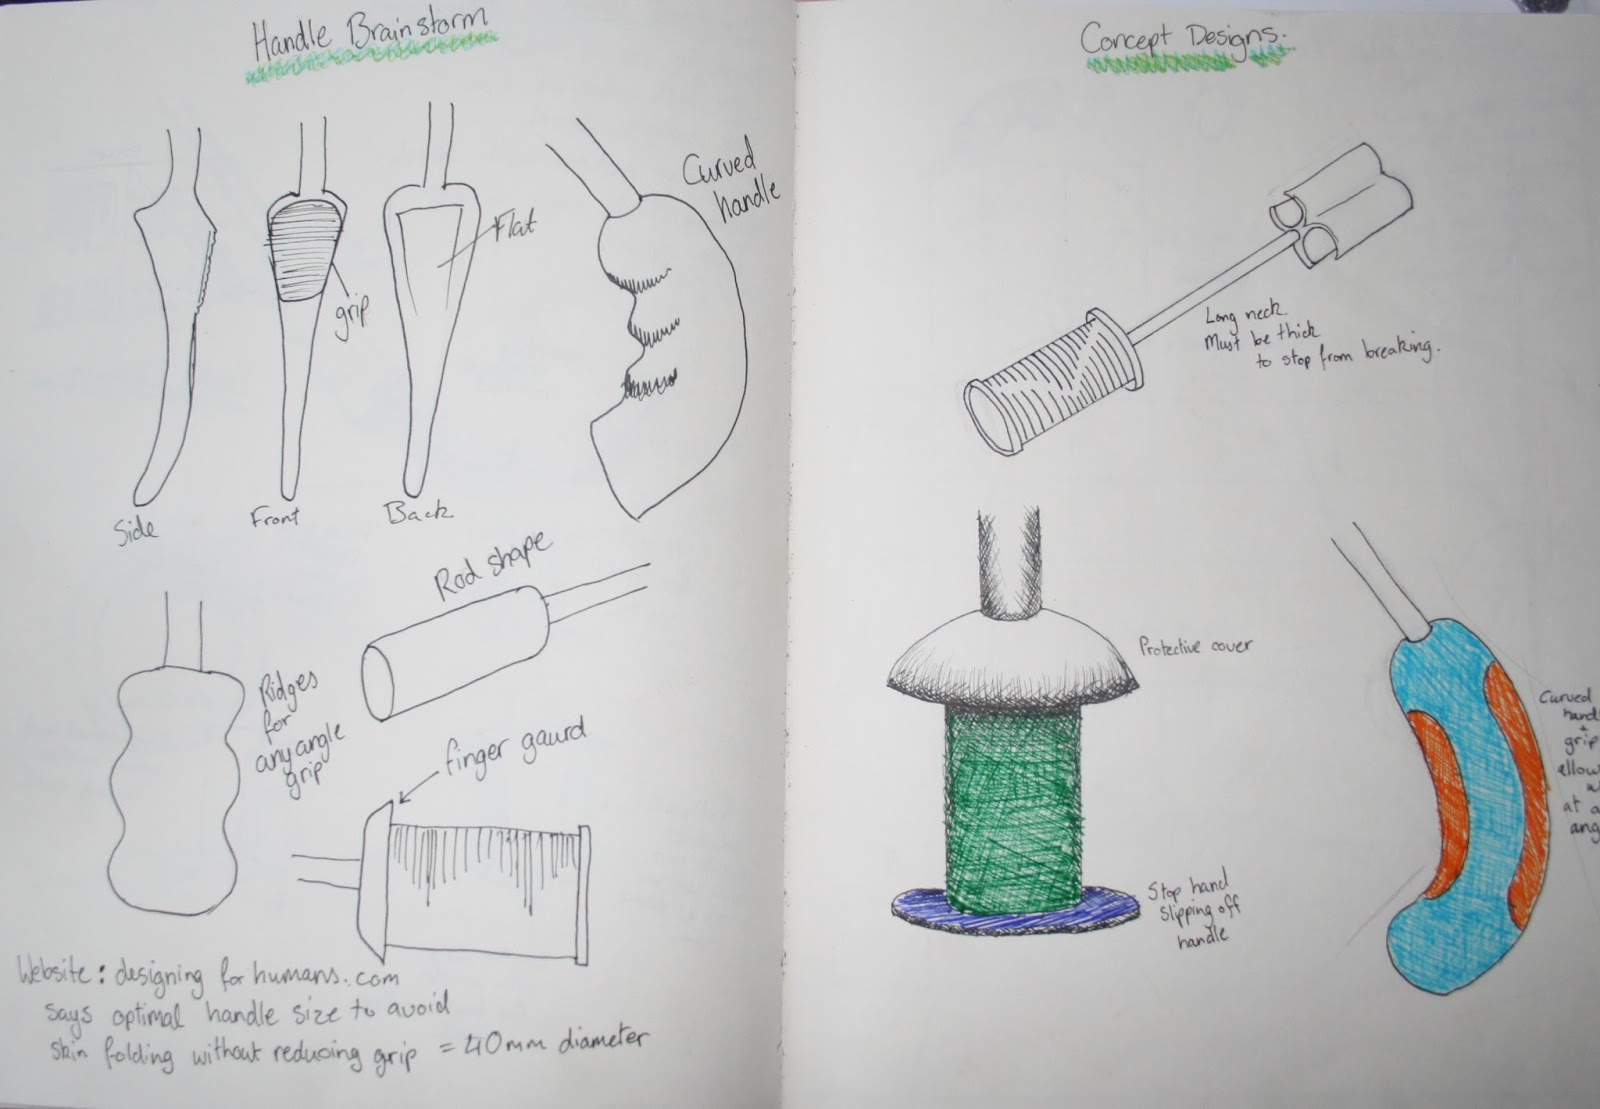

For the handle, I settled on a curved smooth handle with a rounded end. It suited all hand types; smaller hands held at the middle, larger hands held by the rounded end.
I started some more work on the brush head design, settling on an X shaped head that would be covered in bristles to clean multiple surfaces at once.


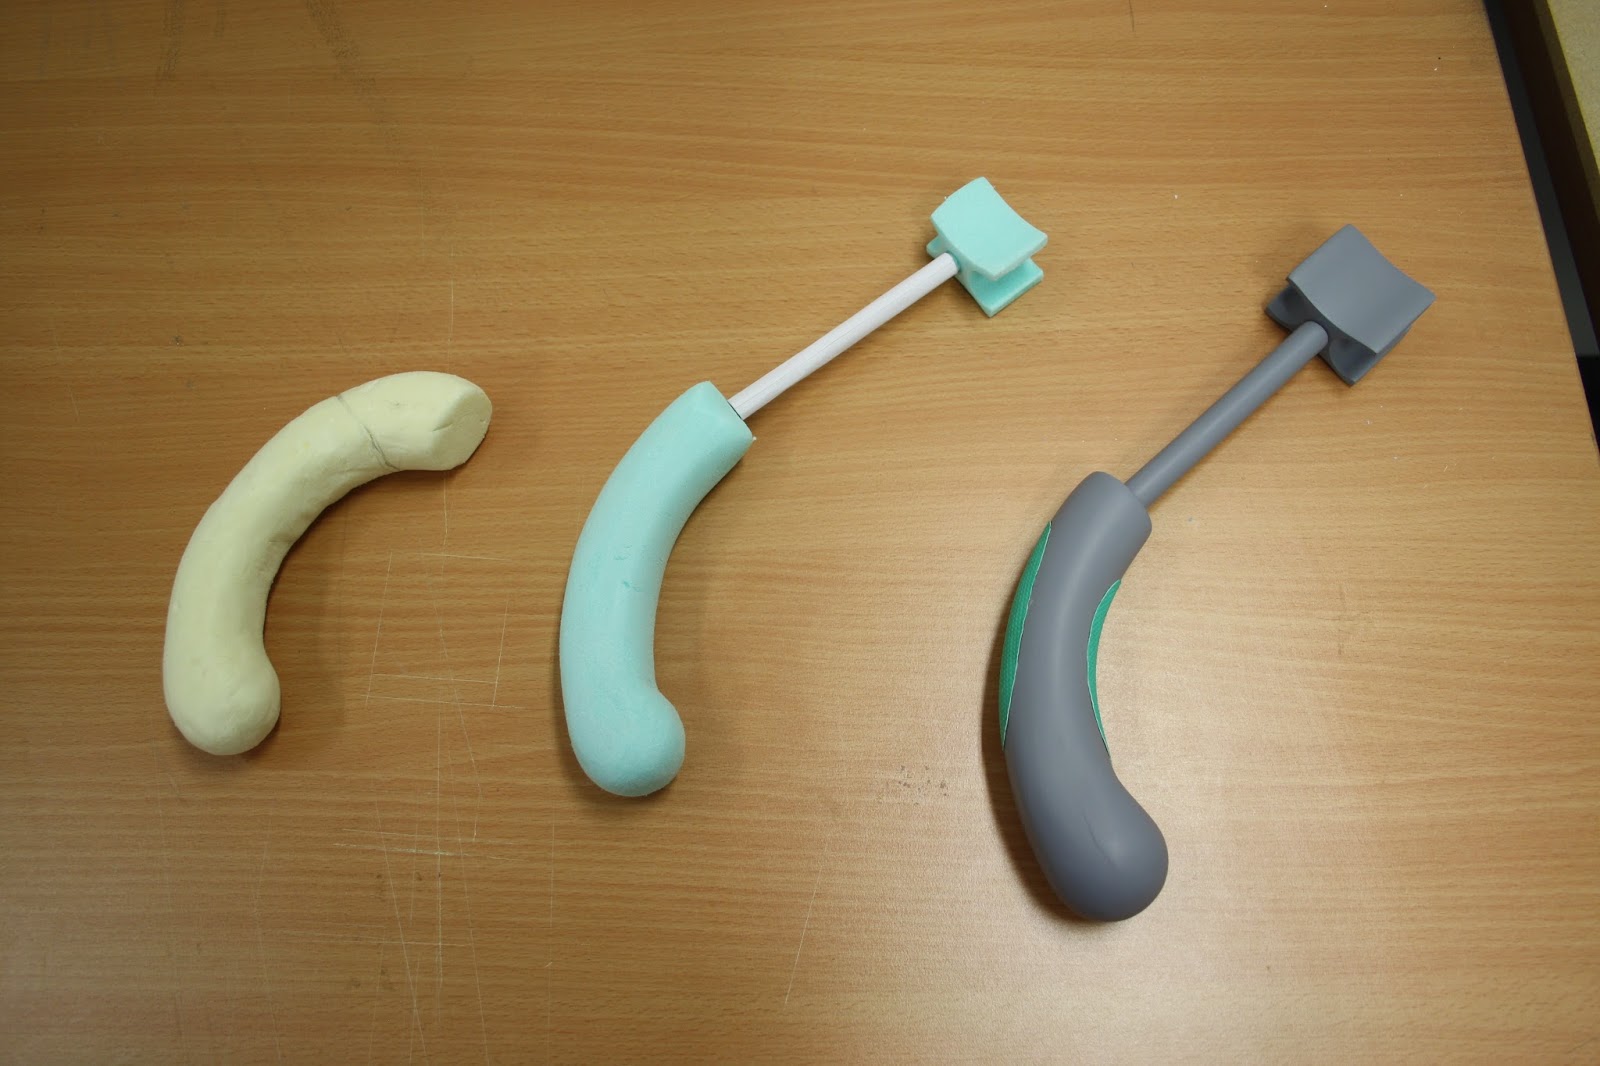
I decided to make some foam prototypes of my designs to check their ergonomic quality and tested them on a small group with a range of hand sizes. I also discussed with my peers about what problem I could encounter and how well it would suit different dog breed. After testing, and making some adjustments, I was happy to continue to the solid prototype.


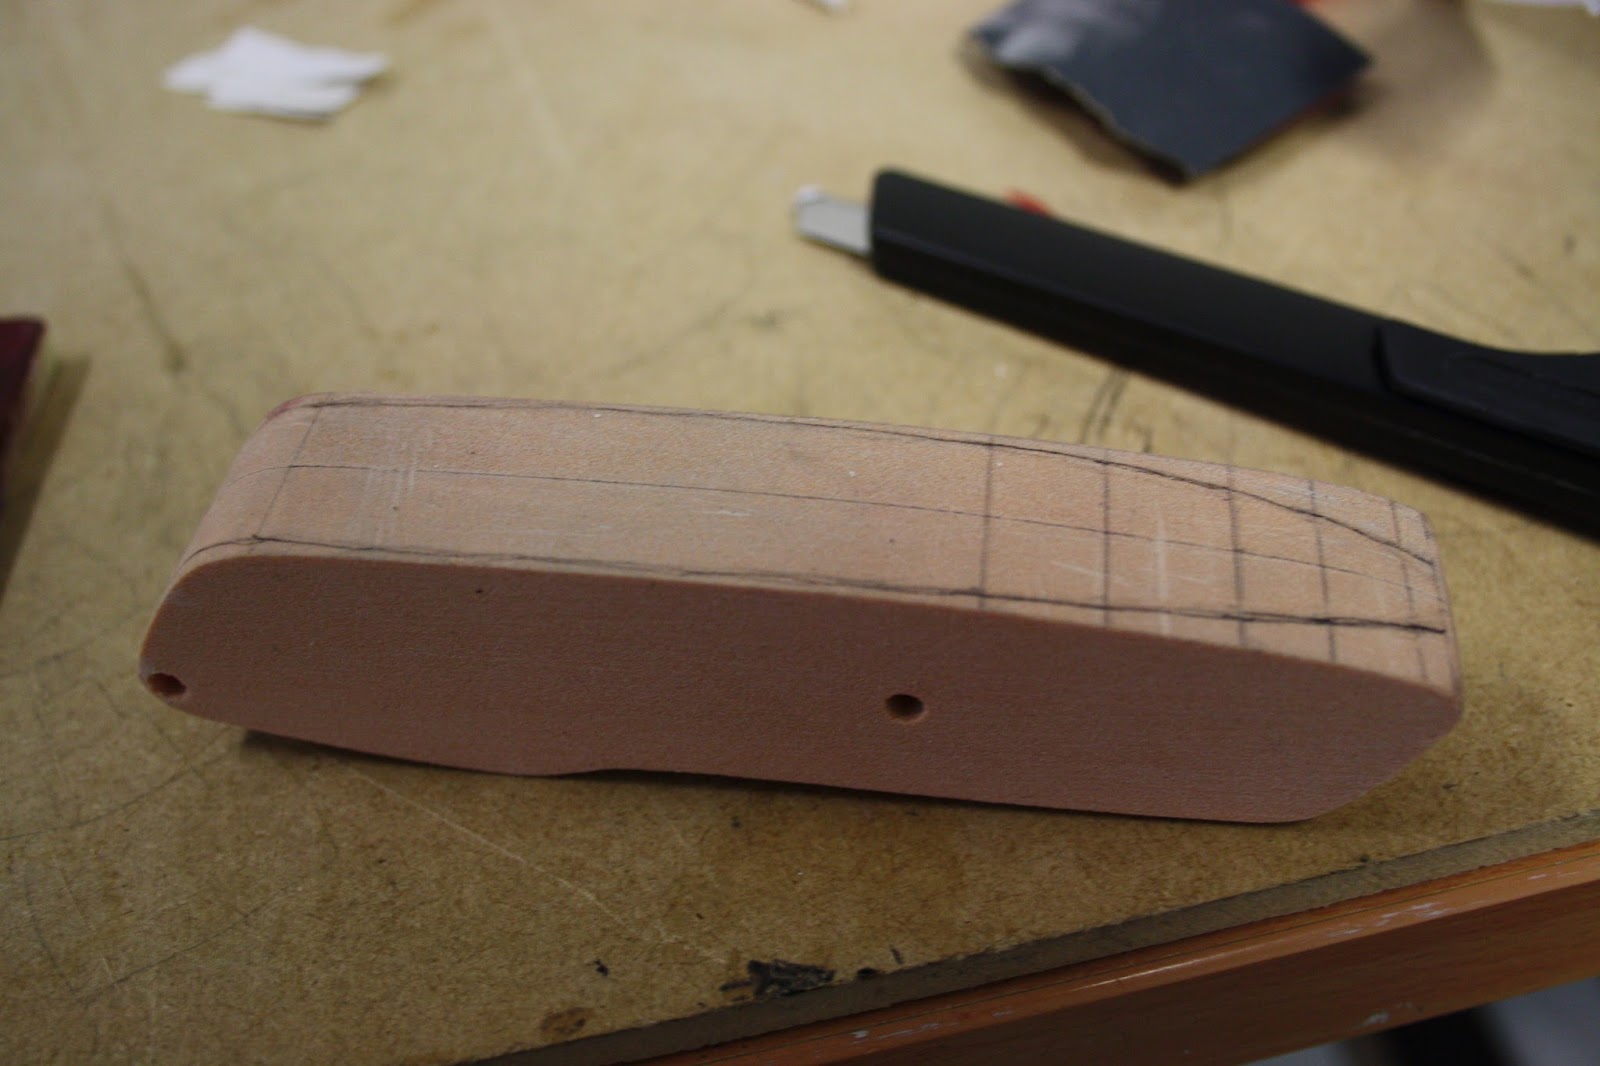
I started making my tooth brush by doing some AutoCAD drawings of the handle and brush head. I used these as templates and glued them to model block. For the handle, I cut the template out using the bandsaw. I also milled a hole that I would attach the neck of the brush into later on. Then I sanded the edges to smooth them out. Once it was smoothed, I added on radii to create the rounded handle. And, as you've guessed, I sanded them down 'til smooth!


For the brush head, I attacked the template to model block and used the milling machine to make the curves and sanded the curves smooth.


In my designs I indicated that bristles would be placed on both the 2 deep curves and 2 shallow curves. This means the bristles are suited to all teeth in the dogs mouth and both top and bottom rows of teeth can be cleaned simultaneously.
After the endless hours of sanding, I used grey primer on the pieces and guess what? Sanded some more!! Until everything was totally smooth. I attached all the parts and attached the brush head using metal rods so it could swivel on the top to show the brush's multifunction. I also attached rubber ribbed strips to the handle to improve grip.


As part of the project I submitted my design process in a digital format as well as my notebooks. For this I used Photoshop to add in all my research and drawings.


And finally, the finished product! Displayed with foam prototypes. I was very proud of this module. I put in a lot of work and found the design process very fun! (My sanding muscles are now stronger than ever).